Jigging Techniques for Maryland’s Chesapeake Bay Striped Bass
If you've spent any time on the Chesapeake Bay chasing striped bass, you know the frustration of seeing fish on your sonar but failing to get a bite. It feels like they're taunting you from below, completely uninterested in your offerings. This guide is all about overcoming that challenge by diving deep into the art of jigging, giving you the comprehensive techniques and insider knowledge to turn those sonar marks into memorable catches right here in Maryland.
Understanding Striped Bass Behavior for Jigging Success
Before we even think about dropping a jig, it’s crucial to understand the mindset of the striped bass, or rockfish as we affectionately call them here in Maryland. These aren't just random swimmers; they're predators driven by instinct, water conditions, and the availability of their next meal. Knowing why they are where they are, and what makes them bite, is the foundation of successful jigging. Without this insight, you're essentially just casting blind, hoping for luck.
Seasonal Movements and Preferred Habitats
Striped bass in the Chesapeake Bay are creatures of habit, largely dictated by water temperature and their spawning cycles. In spring, as water temperatures rise, they move into specific spawning rivers like the Choptank, Nanticoke, and Potomac. After spawning, they disperse into the mainstem Bay to feed voraciously. This is a prime time for jigging, as the fish are actively feeding to recover. During summer, many larger stripers move to cooler, deeper waters or head out into the Atlantic, but plenty remain in the Bay, often holding to structure or deep channels where oxygen levels are better. Come fall, they return to shallower feeding grounds, often schooling up for their epic fall migration, providing some of the most exciting jigging opportunities of the year before they head south for winter. Understanding these patterns, which are deeply tied to Maryland's 2026 Striped Bass Season Dates, is essential for knowing when and where to even look for them.
When we talk about preferred habitats for jigging, we're looking for ambush points. Stripers love structure: oyster reefs, wrecks, channel edges, and especially the pilings of the Chesapeake Bay Bridge. These spots offer them cover from current, places to hide, and funnel points for baitfish. Knowing these areas and focusing your efforts there drastically increases your chances. It’s not just about finding any fish, but finding active fish in prime feeding locations. Even during slower periods, a lone fish hiding near a submerged log might be more willing to strike a jig than a large, lethargic school in open water.
Reading the Water: Tides, Currents, and Structure
The Bay's constant ebb and flow of tides and currents are perhaps the most critical environmental factors for jigging success. Striped bass are opportunists, and strong currents often mean an easy meal. Baitfish get disoriented and swept along, making them vulnerable. Jigging is most effective when fish are actively feeding, and that usually coincides with moving water – either the beginning or end of a strong current. Slack tide, while sometimes productive, often sees fish becoming less active and scattered. Don't be fooled by the calm surface; the underwater currents can be ripping, creating perfect conditions for rockfish to stage.
You also need to read the structure. Is there a sharp drop-off? A submerged hump? A cluster of pilings? These are areas where fish congregate. Pay attention to your fish finder; it's your eyes underwater. Look for bait balls, arches that indicate fish, and even the subtle contours of the bottom. A strong current might push fish to one side of a piling or up against a channel edge, so your jig presentation needs to match that. Ignoring these nuances can mean the difference between a full cooler and a frustrating ride home. We often discuss How Tides Affect Fishing in Maryland's Chesapeake Bay, and jigging is a technique where this knowledge truly pays off.
Essential Jigging Gear for Chesapeake Bay Rockfish
You wouldn't try to build a house with a butter knife, and you shouldn't try to jig for feisty Chesapeake Bay striped bass with inadequate gear. The right rod, reel, line, and, of course, the perfect jig, are not just luxuries; they are fundamental tools that enable effective presentation, solid hooksets, and the power to bring in those hard-fighting fish. Skimping on your setup will only lead to missed opportunities and lost fish, which is a feeling no angler wants to experience.
Rod and Reel Setups for Different Jigging Styles
When it comes to rods for jigging, you're looking for a balance of sensitivity and power. A medium-heavy spinning rod, typically 6'6" to 7'6" long, with a fast action tip and a strong backbone, is ideal. The fast action allows you to feel subtle bites and impart sharp, precise movements to your jig, while the strong backbone provides the leverage needed to fight a large striper out of current or away from structure. Some anglers prefer slightly shorter rods for pure vertical jigging, as they're less fatiguing, while longer rods offer better casting distance for horizontal jigging. You can find a wide array of quality jigging rods on Amazon, often with detailed reviews from other anglers.
Matching your rod with the right reel is equally important. A durable spinning reel in the 4000 to 6000 size range, known for its smooth drag system and robust gearing, is a must-have. Brands like Shimano, Penn, and Daiwa are popular choices among Bay anglers. The drag system is crucial because a big rockfish can make powerful runs, and you need a drag that can handle the pressure without seizing or becoming jerky. The reel's retrieve ratio can also be a consideration; some prefer a faster retrieve for quick jig lifts or to keep up with fast-moving fish, while others opt for a slower ratio for more controlled, methodical jigging.
The Art of Jig Selection: Weight, Color, and Profile
This is where many anglers get overwhelmed, and for good reason—the options are endless! However, understanding the core principles makes it manageable.
- Weight: This is paramount for jigging in the Chesapeake Bay. You need enough weight to get your jig to the desired depth quickly and keep it there, especially in strong currents. Jigs can range from 1/2 ounce for shallow, calm water to 4 ounces or even more for deep water or ripping tides around structures like the Bay Bridge pilings. A general rule of thumb is to use the lightest jig you can get away with that still maintains bottom contact or stays in the strike zone. If you're struggling to keep your jig down, go heavier. If it's plummeting too fast, go lighter. Experimentation is key, and having a good selection of various weights on hand, easily purchased from
Amazon, is crucial. - Color: While anglers often debate color vigorously, the truth is that it can matter, but it's often secondary to presentation. Natural baitfish colors like white, chartreuse, olive, and silver are perennial favorites in the Bay. When water clarity is poor, brighter colors like chartreuse or bright orange can offer better visibility. In clear water, more natural, translucent colors might be more effective. The key is to match the hatch if possible. If the stripers are feeding on alewives, a silver or white jig might be best. If they're on yellow perch, a jig with some yellow or orange could be effective. Don't overlook the impact of
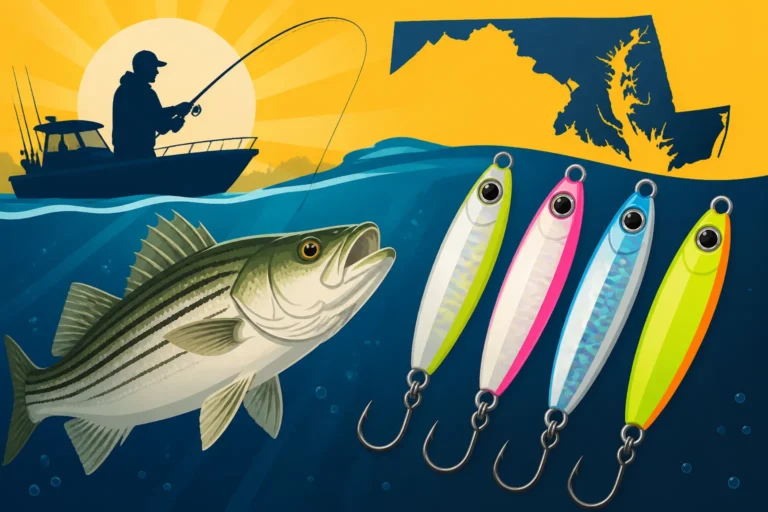
How Water Clarity Affects Fishing in Maryland's Chesapeake Bayon your color choice. - Profile: Jigs come in various shapes and sizes, mimicking different baitfish. Common profiles include slender leadhead jigs with soft plastic bodies (often referred to as "plastics" or "shads"), metal jigs (like Stingsilvers or Crippled Herrings), and even bucktail jigs. Leadhead jigs with soft plastic bodies, such as those from Bass Kandy Delight (BKD), are incredibly versatile. Their soft, flapping tails provide enticing action. Metal jigs, on the other hand, sink faster and have a tighter, more erratic flutter, making them excellent when fish are deeper or when you need to emulate a wounded baitfish. Bucktails, dressed with natural hair, offer a different action and profile, particularly effective for a slower, more subtle presentation.
| Jig Type | Common Weights (oz) | Target Depth/Conditions | Common Colors | Ideal Baitfish Imitated |
|---|---|---|---|---|
| Leadhead w/ Soft Plastic | 1/2 – 4 | Versatile, most conditions | White, Chartreuse, Pearl, Pink | Shad, Alewife, Perch |
| Metal Jig (e.g., Stingsilver) | 1 – 6 | Deep water, strong current, fast retrieve | Silver, Blue, Chartreuse, Green | Bay Anchovy, Spearing |
| Bucktail Jig | 1/4 – 2 | Shallower water, subtle presentation, current | White, Chartreuse, Yellow, Black | Shrimp, Smaller Baitfish |
Line Choices and Terminal Tackle for Maximum Effectiveness
Your line choice is critical for jigging. Braided line, with its superior strength-to-diameter ratio and zero stretch, is the undisputed champion for jigging in the Bay. Its lack of stretch provides unparalleled sensitivity, allowing you to feel even the lightest tap and transmit immediate action to your jig. For most jigging applications, 20-40 lb test braided line is a good starting point. You can easily find various strengths and colors of braided line on Amazon.
However, you should use a fluorocarbon leader. While braid is strong, it's highly visible in water and not very abrasion resistant, especially around structure. A 20-40 lb test fluorocarbon leader, typically 3-6 feet long, provides a nearly invisible connection to your jig and offers excellent abrasion resistance. Connect your braided main line to your fluorocarbon leader using a strong knot like an FG knot or an Albright knot.
For terminal tackle, a quality snap swivel (sized to match your jig weight) is often used to quickly change jigs. Some anglers prefer a direct knot to the jig or a small, strong split ring, especially if they believe the swivel might spook finicky fish. Always use strong, corrosion-resistant components, as the Bay's brackish water can be tough on gear.
Mastering the Jigging Motion: Techniques That Trigger Bites
Once you've got your gear dialed in, it's time to learn how to make that jig dance in a way that striped bass can't resist. Jigging isn't just about dropping a lure and reeling it in; it's an art form, a subtle conversation between you and the fish, where your rod tip is the messenger. The goal is to imitate a wounded or fleeing baitfish, triggering the predatory instincts of the rockfish. If you're not getting bites, it's often because your presentation isn't quite right.
Vertical Jigging: The Classic Approach
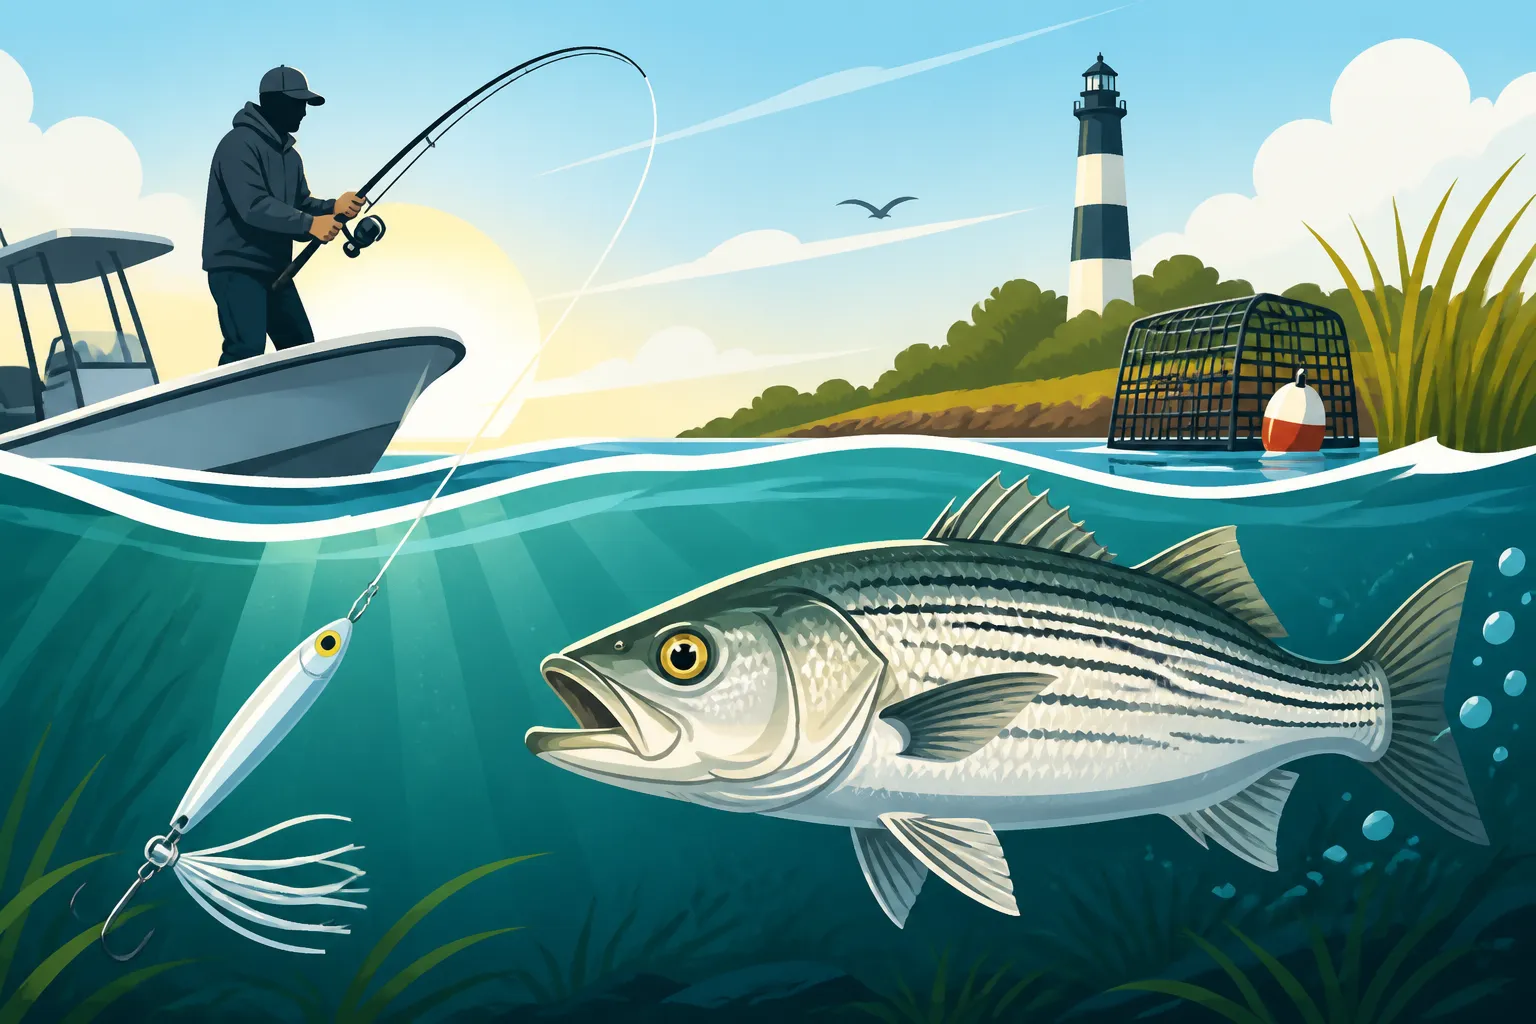
Vertical jigging is perhaps the most common and often effective technique in the Chesapeake Bay, especially when fish are schooled up or holding tight to structure at specific depths. The premise is simple: get your jig directly below the boat, to the depth where the fish are holding, and then impart action.
- Drop and Detect: Cast your jig out slightly, let it sink to the bottom (or to the depth where your fish finder shows fish), and feel for that initial "thump" as it hits. Then, reel up any slack until your line is taut, and you can feel the weight of the jig.
- The Lift and Fall: This is the core motion. Lift your rod tip sharply, anywhere from 1 to 3 feet, then immediately drop it back down, allowing the jig to flutter and fall naturally on a semi-slack line. The bite often occurs on the fall, so it's critical to be attentive. Don't drop your rod too quickly that you lose all contact, but allow enough slack for the jig to perform its enticing wobble.
- Vary the Rhythm: Don't just stick to one speed or height. Experiment. Try short, sharp snaps, followed by a longer fall. Or a series of quick, small twitches. Sometimes, a slow, methodical lift-and-drop is what they want, especially if the fish are lethargic. Other times, an aggressive, fast retrieve and drop is necessary to trigger a reaction strike. The fish will tell you what they prefer if you pay attention. We've often seen How Deep to Jig for Striped Bass in the Bay can directly impact success, as presentation must align with fish depth.
Casting and Retrieving: Horizontal Jigging Tactics
While vertical jigging is powerful, sometimes the fish are spread out, or you need to cover more ground. This is where horizontal jigging, or cast-and-retrieve jigging, shines. It allows you to prospect wider areas and present your jig to fish that might not be directly under your boat.
- Fan Casting: Cast your jig out, letting it sink to the desired depth. Instead of just reeling straight in, use your rod tip to impart jigging motions as you retrieve. A common technique is to make a cast, let the jig sink, then lift the rod, reel down, lift the rod, reel down, all the way back to the boat. This creates a "swim and fall" action.
- Sweep and Pause: Another effective horizontal technique is a long, sweeping motion with your rod, then pausing and reeling up the slack as the jig sinks. This can imitate a baitfish swimming erratically and then fluttering downwards. It's particularly effective when fish are chasing bait on the surface or when you're targeting shallower points or oyster beds.
- Match the Bait: Think about What Do Striped Bass Eat in the Chesapeake Bay? and try to mimic that. If they're chasing schooling baitfish, a faster, more erratic retrieve might be best. If they're feeding on bottom dwellers, a slower, more deliberate retrieve with occasional pauses on the bottom could be more productive. The key is to make your jig look like an easy, appealing target.
Key Jigging Rhythms and When to Vary Them
The "jigging rhythm" is the cadence and intensity of your rod movements combined with your retrieve. There's no one-size-fits-all, and this is truly where experience comes into play.
- Aggressive vs. Subtle: Sometimes, a highly aggressive, fast jigging motion will elicit a reaction strike from stripers that aren't actively feeding. Other times, particularly when the water is cold, or the fish are pressured, a very subtle, almost imperceptible twitch-and-fall is what it takes. It's common to start with a moderately aggressive retrieve and then adjust based on bites or lack thereof.
- High Current/Slack Tide Adjustments: In strong currents, your jig needs to be heavier, and your movements might need to be sharper and quicker to cut through the water and maintain contact. During slack tide, when fish are often less active, a slower, more methodical approach, allowing the jig to suspend longer, can be more effective.
- The "Popcorn" Jig: This is a technique where you aggressively rip the jig up several feet, then let it flutter back down quickly. It's great for covering the water column fast and triggering a feeding frenzy, especially when fish are active. The resulting erratic motion can mimic a fleeing baitfish, often prompting a strike as the jig descends.
- The "Dead Stick" Jig: This involves lifting the jig a foot or two, then holding it completely still for several seconds before letting it fall. It capitalizes on the striper's curiosity and their tendency to strike something that appears injured or easy to catch. This slower, more patient approach is often effective on finicky fish or in colder water. Remember, Trolling vs Jigging for Maryland Striped Bass are two distinct approaches, and mastering the nuances of each presentation is what separates good anglers from great ones.
Finding the Fish: Locating Striped Bass for Jigging
The best jigging technique in the world is useless if you're fishing in empty water. Finding the fish is half the battle, and in the vast expanse of the Chesapeake Bay, that can feel like looking for a needle in a haystack. But stripers, like most predatory fish, are predictable to a degree. They gravitate towards certain types of structure and depth, especially when feeding. Learning to identify these key areas, and effectively using your electronics, dramatically boosts your chances of success.
Targeting Bay Bridge Pilings and Artificial Reefs
The Chesapeake Bay Bridge is a massive artificial reef system, a magnet for baitfish and, consequently, striped bass. The pilings create current breaks, eddies, and vertical structure where fish can hide, ambush prey, and escape the main flow. Jigging around the pilings is a classic and highly productive method, but it also comes with its challenges – mainly the risk of snags.
When approaching the Bay Bridge, pay close attention to the tide. Fish will often stage on the down-current side of the pilings, waiting for bait to be swept by. Position your boat to drift along the pilings, dropping your jigs close to the structure without getting hung up. Fan cast around the pilings, letting your jig sink deep. Be prepared for aggressive strikes; stripers ambushing from cover can hit like a freight train. You can learn more about Fishing the Bay Bridge Pilings for Striped Bass in a dedicated guide.
Beyond the Bridge, the Maryland Department of Natural Resources (DNR) has established numerous artificial reefs throughout the Bay. These reefs, constructed from materials like concrete rubble, old tires, and even sunken barges, provide vital habitat for a multitude of species, including striped bass. Researching these reef locations beforehand (often available on the DNR website) and targeting them with your jigging gear can lead to excellent results. These reefs often hold schools of baitfish, which in turn attract hungry rockfish looking for an easy meal.
Interpreting Sonar and Electronics
Your fish finder is your most valuable tool when jigging. It doesn't just show fish; it reveals the underwater topography, depth, water temperature, and even the presence of baitfish. Learning to interpret what you see on the screen is crucial.
- Distinguishing Arches: A common frustration is seeing "fish" on the screen but not getting bites. Small, scattered arches might be baitfish or small, uninterested fish. Large, distinct arches, especially multiple ones holding close to structure or suspended at a certain depth, are what you're looking for. A "cloud" on the screen often indicates a bait ball, and where there's bait, there are usually predators nearby.
- Reading the Bottom: Your sonar also shows the bottom. Look for hard bottom (which appears as a thicker, more intense line), ledges, humps, and any irregular features. These are prime areas where stripers will hold. If you see your jig on the screen (which you often can if you're directly over it), you can precisely present it to the fish you're targeting.
- Side Imaging/Down Imaging: If you have more advanced sonar, use it! Side imaging can show you fish holding off to the sides of your boat, allowing you to cast to them. Down imaging provides a photographic-like view directly below, helping you pinpoint structure and individual fish with incredible accuracy. Mastering your electronics will save you countless hours of unproductive fishing.
Fishing Channel Edges and Drop-Offs
The Chesapeake Bay is crisscrossed with deep shipping channels and natural deep-water channels. The edges of these channels, where the depth abruptly changes from shallow flats to deeper troughs, are classic striper holding areas. Fish will often patrol these edges, moving up onto the shallower flats to feed during certain tides and retreating to the deeper, cooler water when conditions change.
- Locating the Edge: Use your chartplotter and sonar to identify these channel edges. Look for areas where the contour lines are close together, indicating a steep drop.
- Drifting the Edge: A popular technique is to position your boat to drift along the channel edge, allowing your jigs to sweep down the drop-off. Adjust your jig weight to ensure it maintains contact with the bottom or stays in the strike zone as the depth changes. Stripers often stack up along these transitions, especially where there's a confluence of current. Best Structure to Target for Chesapeake Bay Striped Bass often includes these overlooked areas.
- Tidal Influence: Pay close attention to how the tide affects the fish on these edges. An incoming tide might push bait onto the flats, drawing stripers up. An outgoing tide might flush bait off the flats, causing stripers to congregate along the edge to ambush. Understanding these movements is key to precise jig presentation and maximizing your time on the water.
Common Jigging Challenges and How to Overcome Them
Let's be real: jigging isn't always easy. There are days when the fish are finicky, the snags are relentless, and the weather seems to conspire against you. Every angler, no matter how seasoned, has faced these frustrations. The difference between a successful day and a bust often comes down to adaptability and knowing how to troubleshoot common issues. Expecting things to go perfectly every time is a recipe for disappointment, but being prepared to adjust is how you turn a challenging day into a rewarding one.
Dealing with Finicky Fish and Slow Bites
You've found the fish, you're jigging, but nothing is happening. It's maddening, right? Don't despair; this is a common scenario, and there are several tricks you can try:
- Slow Down or Speed Up: If a fast, aggressive retrieve isn't working, try slowing everything down. Let the jig pause longer on the fall, or reduce the intensity of your lifts. Conversely, if you're being too subtle, try a few aggressive rips to trigger a reaction strike. Sometimes, a completely different tempo is all it takes.
- Change Jig Size or Profile: If the stripers are keyed in on very small baitfish, a large jig might be ignored. Try downsizing to a lighter, more diminutive jig. Or, if you're using a soft plastic, switch to a metal jig for a different fall rate and flash. The specific Best Lure Colors for Jigging Chesapeake Bay Rockfish can also play a role, so don't be afraid to swap out colors, especially if water clarity has changed.
- Add Scent: A little scent can go a long way, especially when fish are hesitant. Applying a fish attractant gel or spray to your soft plastic jigs can often give them that extra appeal needed to trigger a bite. Sometimes, even adding a small piece of natural bait, like a clam snot or a piece of peeler crab, can turn the tide.
- Adjust Depth: Are you seeing fish at 25 feet, but your jig is only getting to 20? Or are you hitting bottom, but the fish are suspended higher? Precision in depth is critical. Adjust your jig weight or your counting method to ensure your lure is spending the maximum amount of time in the strike zone. Remember that even a few feet can make a huge difference.
Preventing Snags and Lost Lures
Jigging around structure, while productive, inevitably means dealing with snags. Losing expensive jigs and valuable fishing time is incredibly frustrating. However, some strategies can help minimize these losses:
- Know Your Bottom: Use your sonar to understand the type of bottom you're fishing. Is it rocky? Muddy? Full of oyster shells or debris? The more you know, the better you can adjust.
- Verticality is Key: When fishing pilings or wrecks, try to keep your boat directly over your jig. This allows for a more vertical presentation and a quicker, more direct lift, helping to pull the jig up and away from snags on the retrieve. If you drift too far, your line can angle into the structure.
- The "Pop" Technique: If you feel your jig nudging the bottom or structure, give your rod a quick, sharp "pop." This often frees the jig before it gets completely wedged. If it does get stuck, try feeding slack line, then pulling taut in different directions. Sometimes, the current will help dislodge it.
- Use Strong Knots and Leaders: While not preventing snags, strong knots and a robust fluorocarbon leader will prevent break-offs above the jig. This means you'll only lose the jig itself, not a whole section of your main line.
- Consider Jighead Design: Some jigheads are designed to be more "weedless" or "snag-resistant," with a more pointed nose that helps them slide over structure rather than wedge into it. Experiment with these designs in particularly snaggy areas.
Adjusting to Changing Conditions
The Chesapeake Bay is dynamic, and conditions can change rapidly. What worked an hour ago might be completely ineffective now. Being able to adapt on the fly is a hallmark of a successful Bay angler.
- Current Changes: As mentioned, current is huge. If the tide picks up or slacks off, your jig weight, retrieve speed, and presentation might need to change. Stronger current often means heavier jigs and more aggressive jigging to get down. Weaker current allows for lighter jigs and a more subtle approach.
- Wind and Drift: A strong wind can make boat control difficult, causing you to drift too fast or too far off your target. In these situations, consider using a drift sock or sea anchor to slow your drift, allowing for better jig presentation. If the wind is blowing against the current, it can create a very slow drift, which can be fantastic for vertical jigging.
- Water Clarity: Heavy rains can muddy the water, reducing visibility. In these conditions, switch to brighter, more contrasting jig colors (like chartreuse or fluorescent orange) and consider adding scent. Conversely, in very clear water, more natural colors and a fluorocarbon leader become even more critical. You can refer to our guide on Maryland Striped Bass Fishing Techniques for broader strategies to adapt to various conditions.
- Fish Mood Swings: Just like us, fish have good days and bad days. Sometimes they're aggressively feeding; other times, they're lethargic and require coaxing. Don't be afraid to experiment with every variable: jig type, size, color, retrieve speed, pauses, and even the time of day. The most persistent and adaptable angler is often the one who finds success.
Disclaimer
Please remember that fishing regulations, including Maryland Fishing Size and Catch Limits by Species, can change. Always consult the latest Maryland Department of Natural Resources (DNR) rules and regulations before heading out on the water. This guide is for informational purposes only and does not constitute legal advice. Safe boating practices and responsible angling are always encouraged.