Bottom Rig Setup for Maryland Flounder Fishing
It’s a tale as old as time for Maryland anglers: you're out on the water, excited for a day of flounder fishing, you cast your line, and… nothing. Or worse, you feel a subtle tap, set the hook, and come up empty. Flounder can be notoriously finicky, lurking camouflaged on the bottom, and if your rig isn't presented just right, they'll simply ignore it. This guide is here to walk you through the nitty-gritty of setting up the perfect bottom rig for Maryland flounder, turning those frustrating empty retrieves into successful catches.
Understanding the Maryland Flounder Fishery
Before we even think about tying knots, it’s crucial to understand the elusive flounder and their preferred hangouts in Maryland waters. These flatfish are masters of disguise, blending seamlessly into the sandy or muddy bottom, waiting for an unsuspecting meal to swim by. This ambush predator strategy is precisely why a well-designed bottom rig is your best friend.
Why Flounder Love Bottom Structure
Flounder aren't just swimming around aimlessly; they're strategically positioned, using the underwater landscape to their advantage. Imagine a sniper waiting in camouflage, perfectly still, until the moment is right to strike. That's a flounder. They gravitate towards areas with distinct changes in depth or composition, providing them cover and a steady current to bring food right to their doorstep. Think about those sharp channel edges where the depth quickly drops off, or submerged oyster beds that provide both structure and a buffet of smaller organisms. Wrecks and artificial reefs, whether purpose-sunk or naturally formed, are absolute magnets, creating a complex ecosystem where flounder can thrive. Even man-made structures like bridge pilings and jetties, such as those found around the entrance to Ocean City's Inlet and Jetties, create current breaks and eddies that accumulate baitfish, making them prime flounder real estate.
Understanding these preferences is the first step in successful flounder fishing. If you're not putting your bait where the flounder are lying in wait, you're just fishing in hopes, not with a plan. Your bottom rig needs to be designed to land your bait precisely in these zones and keep it there, dancing enticingly right in front of a hidden flounder's nose. The challenge, of course, is that these areas also tend to hold snags, so a good rig balances effective presentation with minimizing hang-ups.
Key Considerations for Maryland Waters
Maryland's diverse waterways present a variety of conditions that directly impact your flounder fishing strategy. The mighty Chesapeake Bay, its numerous tidal rivers, and the coastal bays behind Ocean City each have their own quirks. One of the biggest factors is the tide and current. Flounder are not fans of fighting strong currents; instead, they position themselves just out of the main flow, in the "lee" of structure, where baitfish are swept by without having to expend much energy. This is why you'll often find them on the down-current side of a channel edge or a jetty. Fishing the Thorofare Near Ocean City, for example, means you're constantly thinking about how the tide is moving and where the fish will be staging.
Another crucial consideration is the local forage. What are the flounder eating right now? In Maryland, their diet typically consists of small fish like minnows, silversides, and peanut bunker, as well as crustaceans like grass shrimp and small crabs, and even strips of squid. Matching your bait to what's naturally available can significantly increase your success. If you're using a large chunk of something they rarely encounter, it might get ignored. Water clarity also plays a role; in murkier conditions, scent becomes more important, while in clear water, the visual appeal and natural presentation of your bait are paramount. The best anglers are those who pay attention to these environmental cues and adjust their approach accordingly, understanding that what worked yesterday might not work today due to changing conditions.
The Essential Components of a Flounder Bottom Rig
Building a successful flounder bottom rig isn't about throwing a hook and sinker together; it's about a thoughtful combination of components, each serving a specific purpose. From your rod and reel to the smallest bead, every piece contributes to how effectively you present your bait and detect those subtle flounder bites.
Rod, Reel, and Line Selection
Choosing the right rod and reel combination is fundamental for flounder fishing. You're looking for a rod that offers a delicate balance: enough sensitivity to detect the slightest tap of a flounder's mouth, but also enough backbone to effectively set the hook and fight a decent-sized flatfish. A medium-light to medium power spinning rod, typically between 6.5 and 7.5 feet in length, is often ideal. The sensitive tip will telegraph those soft bites, while the moderate action allows for good casting distance and absorbing head shakes. For the reel, a reliable spinning reel in the 2500-4000 series is usually a great choice. Look for one with a smooth drag system, as you don't want any jerking motions to break your line or pull the hook. A decent retrieve ratio will help you take up slack quickly, which is critical for staying in touch with your rig on the bottom.
When it comes to line, you have a couple of primary choices: monofilament or braided line. Many anglers prefer braided line (10-20 lb test for a main line) due to its superior sensitivity and lack of stretch, which means you feel those subtle bites much more clearly. It also has a smaller diameter for its breaking strength, allowing for longer casts and cutting through current better. However, braid is less abrasion-resistant and can be visible in clear water. This is where a fluorocarbon leader comes in, typically 20-30 lb test, tied to your braid with a strong knot like a FG or Albright. Fluorocarbon is nearly invisible underwater and offers excellent abrasion resistance against sharp shells or structures on the bottom. If you prefer monofilament, a 15-20 lb test main line is a good all-around choice for its shock absorption and knot strength. Regardless of your choice, ensuring your line is in good condition and your knots are tied correctly is non-negotiable for success. You can find a vast selection of quality fishing lines and leaders, like Berkley Vanish fluorocarbon or PowerPro braided line, on platforms like Amazon, making it easy to stock up before your next trip.
Weights, Swivels, and Beads
These seemingly small components are the unsung heroes of your bottom rig, ensuring your bait stays where it needs to be and your line remains manageable. The sinker, or weight, is perhaps the most important for bottom fishing. Its type and weight depend heavily on the current and depth. For fishing in strong currents, like those found around the deeper channels of the Chesapeake Bay or in Ocean City's Inlet, pyramid sinkers or Hatteras sinkers (often 2-4 ounces or more) are excellent because their shape helps them dig into the bottom and resist rolling. In lighter currents or when drifting, bank sinkers or cannonball sinkers (1-3 ounces) might be sufficient. The goal is to use just enough weight to hold bottom without being excessive, as too much weight can make your rig feel unnatural and dampen your ability to detect bites.
Swivels are crucial for preventing line twist, especially when using live bait or in areas with strong currents that can cause your line to spin. A good quality barrel swivel is standard for connecting your main line to your leader. For rigs with multiple leaders or specialized presentations, a three-way swivel can be invaluable. These small but mighty pieces of hardware also provide a strong connection point between different sections of your rig, allowing for easy assembly and replacement of components.
Beads, while often overlooked, serve multiple purposes. They can be placed above a swivel to protect the knot from a sliding sinker, preventing chafing and weakening. They also add visual appeal, especially when brightly colored or fluorescent, acting as an additional attractor to passing flounder. Sometimes, a series of beads above the hook can mimic a small school of baitfish or provide a subtle clacking sound that grabs a flounder's attention. Think of them as tiny pieces of flair that can make a big difference, especially in stained water where a little extra flash or color can make your bait stand out.
Hooks and Leaders
The "business end" of your flounder rig is where the magic happens – or doesn't, if you choose poorly. Hook size and type are critical. For flounder, hooks in the #1 to 3/0 range are generally effective, depending on the size of your bait and the average size of the fish you're targeting. Kahle hooks, sometimes called "mutu" hooks, are popular because their unique shape allows for a good hookset in the corner of the fish's mouth, often leading to better retention and making them a good option for live bait. Traditional J-hooks are also fine, but some anglers prefer circle hooks, which are designed to hook fish in the mouth, often preventing gut hooks, especially if you plan on releasing any fish. The key is to ensure your hooks are razor-sharp—a dull hook is a recipe for missed bites, as flounder have bony mouths and a good penetration is essential.
Your leader material and length are equally important. As mentioned before, fluorocarbon leader material (20-30 lb test) is highly recommended for its near invisibility underwater and excellent abrasion resistance. The length of your leader can significantly impact your presentation. For a traditional bottom rig where the bait needs to be right on the bottom, leaders can be as short as 12-18 inches. However, when drifting or trying to get your bait to waft just above the bottom, a longer leader of 24-36 inches might be more effective. The goal is to allow your bait to move naturally with the current, rather than being rigidly held in place. Experimentation with leader length is often necessary to find what works best on a given day, as conditions like current speed can dictate how your bait moves. Having a variety of pre-tied leaders or the components to tie them on the fly can make a big difference in adapting to fishing conditions.
Popular Maryland Flounder Bottom Rig Configurations
Now that we've covered the individual components, let's put them together into some tried-and-true flounder bottom rig configurations that Maryland anglers rely on. Each rig has its strengths and ideal scenarios, so understanding when to deploy which one is key to maximizing your success.
The Basic Flounder Rig High-Low/Double Drop
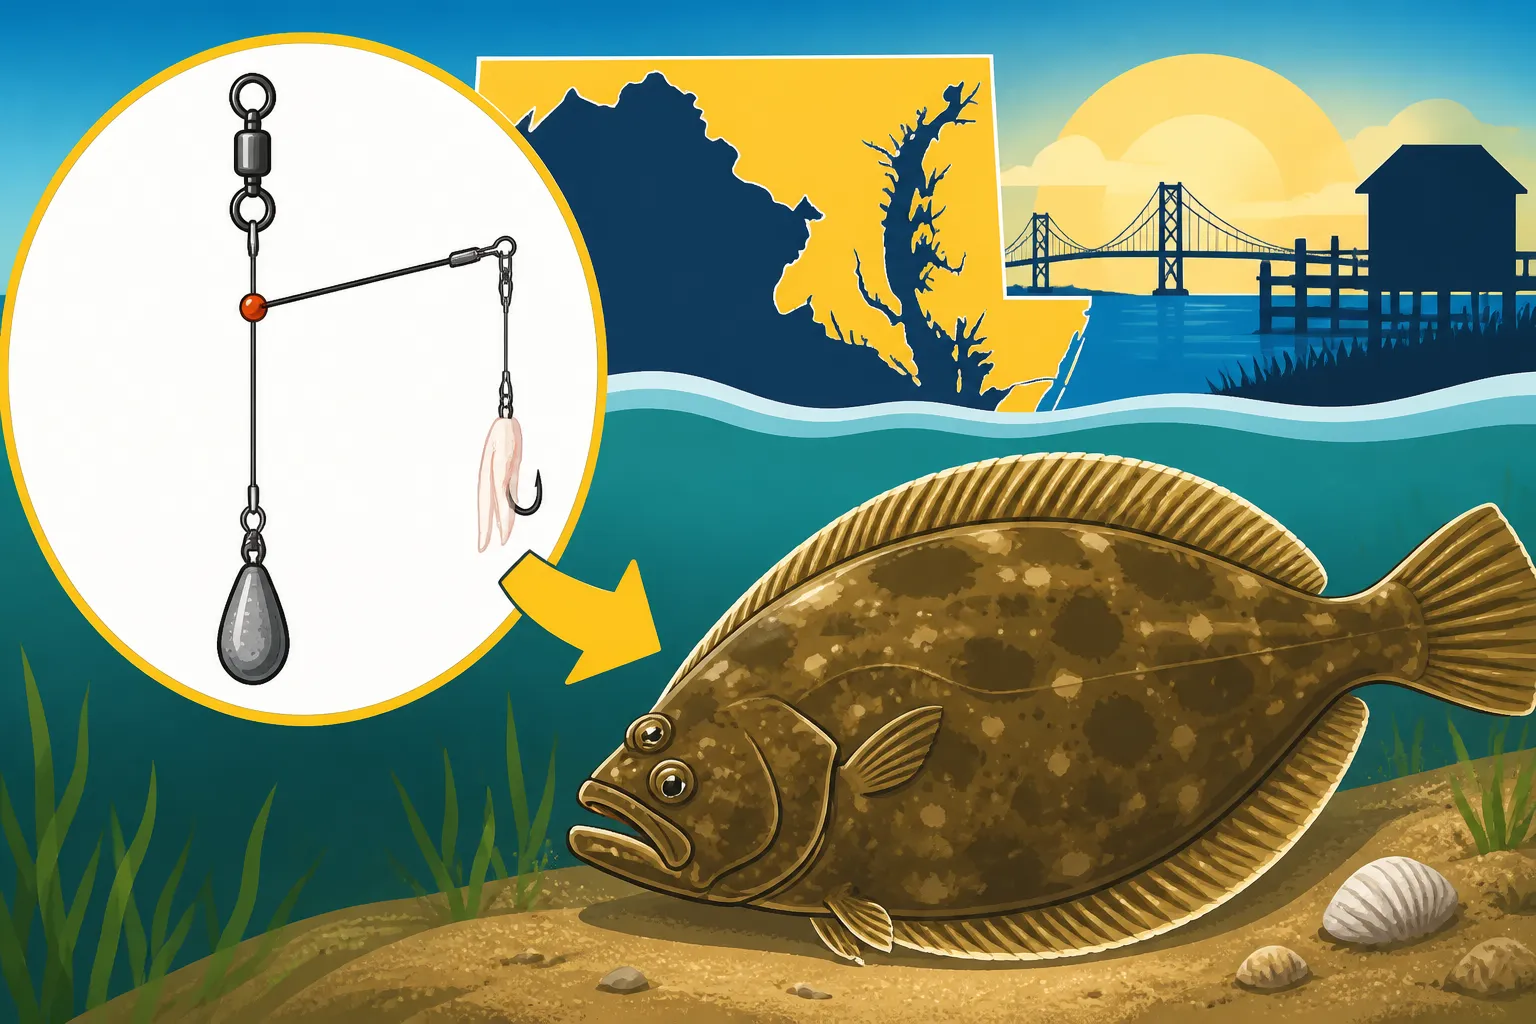
The high-low, or double-dropper, rig is arguably the most common and versatile bottom rig for flounder fishing in Maryland. Its primary advantage is that it allows you to present two baits at different levels in the water column, increasing your chances of finding where the flounder are feeding. It’s also excellent for trying different baits simultaneously to see what they prefer on any given day. To construct it, you typically start with a 3-4 foot section of fluorocarbon or heavy monofilament leader material. You'll tie two dropper loops along this section, usually 12-18 inches apart. These loops are where your hooks will attach. The bottom of the leader will have a loop for your sinker, and the top will have a barrel swivel to connect to your main line.
Here's a step-by-step for tying the dropper loops: First, decide where you want your loop. Create a small loop in your leader material, then make two or three twists around the main line of the loop. Pass the tag end through the center of these twists, then pull tight to cinch it down. Repeat this for the second dropper loop. Once your loops are tied, attach your hooks directly to the loops or via small snelled leaders for a bit more freedom of movement. Your sinker will go on the very bottom, and your main line will connect to the swivel at the top.
This rig excels when fishing from piers, jetties, or anchored boats in areas with moderate current. You can bait one hook with a live minnow and the other with a strip of squid, or try two different artificial baits. The two presentation points increase your odds. For example, when fishing from a pier like those found in the Ocean City Maryland Fishing Guide, casting this rig near channel edges or bridge pilings allows you to cover more ground and test different offerings. The high-low rig is straightforward, effective, and a must-have in any Maryland flounder angler's repertoire.
The Flounder/Fish Finder Rig
When fishing conditions call for a more natural bait presentation, especially when drifting or in areas with very light current, the flounder or fish finder rig shines. The ingenious design of this rig allows a fish to pick up the bait and swim off without immediately feeling the resistance of your sinker. This often translates to more confident bites and better hookups, as the flounder doesn't get spooked by unnatural tension on the line.
Assembling a fish finder rig is quite simple. First, you'll slide a fish finder clip (or simply a large enough sinker slide) onto your main line. A bead is then threaded onto the main line, which acts as a buffer to protect your knot from the sliding sinker. Next, tie a strong barrel swivel to the end of your main line, securing the sinker and bead above it. To the other end of the barrel swivel, attach a 18-36 inch section of fluorocarbon leader, and then tie your chosen hook to the end of the leader. Finally, clip your sinker (a bank or pyramid sinker often works best) onto the fish finder clip.
This setup is particularly effective when you're drifting across flats or channel edges, allowing your bait to tumble along the bottom in a very natural way. The flounder picks up the bait, and because the sinker slides freely on your main line, it doesn't feel the weight of the sinker. Instead, the line simply slips through the clip, giving the fish time to fully engulf the bait before you feel the bite and set the hook. This rig is fantastic for subtle biters and can dramatically improve your success rate compared to rigs where the sinker is fixed directly above the hook. Many anglers find this rig invaluable when actively seeking flounder over larger areas, as discussed in the article Drifting vs Anchoring for Flounder in Maryland.
Incorporating Attractors and Baits
Beyond the basic hardware, what you put on your hooks and how you make it attractive can make all the difference. Flounder are primarily sight and scent feeders, so appealing to both senses is crucial. Many anglers swear by adding various attractors to their rigs. Small spinner blades, often brass or silver, can be added above a hook to create flash as the rig moves, mimicking the glint of small baitfish. Colored beads, especially chartreuse, red, or glow-in-the-dark, can also draw attention, providing a visual target in murky water. Soft plastic grubs, curl-tail worms, or small bucktails can be threaded onto the hook in combination with natural bait, adding action and bulk. One particularly effective artificial bait that many Maryland flounder fishermen praise are scented soft plastics like Berkley Gulp! Alive! This brand produces highly effective artificial baits that release scent, making them almost as good as live bait. Whether it's a Gulp! shrimp, swimming mullet, or peeler crab imitation, these can be purchased easily from online retailers like Amazon and are a staple in many tackle boxes.
When it comes to natural bait, live offerings are often irresistible. Small live minnows, sometimes called "bull minnows" or "killifish," are a top choice. They can be hooked through the lips or just behind the dorsal fin, allowing them to swim naturally. Small peanut bunker or silversides, if available, are also excellent. If live bait is scarce or inconvenient, cut bait is a solid alternative. Strips of fresh squid are perhaps the most popular, as they are tough, stay on the hook well, and have a strong scent. Cut pieces of fresh spot, croaker, or even bluefish can also be very effective, releasing natural oils and scent into the water. The key with cut bait is to ensure it's fresh and cut into strips that are about 3-5 inches long and tapered, allowing them to flutter enticingly in the current. Don't be afraid to experiment with different combinations: a live minnow tipped with a squid strip, or a Gulp! bait paired with a piece of cut fish can often be more effective than a single offering.
Tips for Successful Flounder Fishing with Bottom Rigs in Maryland
Perfecting your rig is only half the battle. Knowing where, when, and how to present it dramatically increases your chances of success. Flounder fishing requires patience, keen observation, and the willingness to adapt.
Reading the Water and Targeting Hotspots
Successfully catching flounder in Maryland means becoming an expert at reading the water. Flounder aren't randomly scattered; they congregate in specific areas that offer them shelter, ambush points, and a steady food supply. Key hotspots to look for include the edges of navigation channels, where the depth abruptly changes from shallow to deep. These drop-offs are highways for baitfish and perfect ambush points for flounder. Submerged structures like oyster beds, artificial reefs, and even debris can hold significant numbers of flounder, providing excellent cover. Tidal rivers and coastal bays will have numerous creeks and feeder streams that create eddies and current breaks, especially around their mouths, which are prime flounder territory. Areas around bridge pilings, docks, and jetties, like those you might find when fishing Ocean City's Inlet and Jetties, also provide current breaks and a concentration of bait.
Understanding how current and tide affect these spots is paramount. Flounder typically position themselves on the down-current side of structure, out of the main flow, waiting for food to be swept past them. This means that as the tide changes direction, their preferred ambush points will also shift. If you're fishing from a boat, a good depth finder is invaluable for identifying these subtle changes in bottom contour and locating hidden structures. From shore or a pier, you'll need to observe the water's surface for current lines, eddies, and areas where baitfish are congregating. Don't be afraid to move if a spot isn't producing; flounder often hold in specific pockets, and a slight repositioning of your boat or a longer cast might put your bait right in front of them. For a deeper dive into the specific rules that govern flounder, you might want to check out the Maryland Flounder Regulations for 2026.
Presentation and Retrieval Techniques
Once you've got your perfect rig and found a promising spot, how you present and retrieve your bait is the next critical step. Casting accuracy is crucial; you need to get your rig right into the strike zone, whether that's along a channel edge, next to a piling, or directly over a submerged oyster bed. Once your rig hits the bottom, the key is to impart a natural, enticing action to your bait.
One common and highly effective technique is a slow, methodical retrieve with occasional pauses and subtle jigging motions. You want your sinker to occasionally tap or drag along the bottom, stirring up puffs of sand or mud, which can mimic a fleeing baitfish or a foraging creature. After letting your rig settle, lift your rod tip a foot or two, then slowly drop it back, reeling in any slack as the sinker settles again. This lift-and-drop, or "dragging" motion, often triggers a strike. Sometimes, simply leaving the rig dead-sticked on the bottom, especially with live bait, can be effective, letting the current do all the work.
Feeling the bite is perhaps the most challenging aspect. Flounder bites can range from a subtle "tap-tap" or a slight increase in line tension to a more aggressive "thump" that leaves no doubt. The trick is to resist the urge to set the hook immediately. When you feel that first tap, lower your rod tip slightly, give the flounder a few seconds to fully mouth the bait, and then, with a smooth, firm sweep of the rod, set the hook. Too quick, and you'll pull the bait away; too slow, and they might spit it out or swallow it too deep. Pay close attention to your rod tip and the feel of your line for any unusual sensations. You might also want to explore Techniques for Catching Flounder in Maryland's Back Bays for more specific guidance.
Troubleshooting Common Rig Problems
Even with the best preparation, fishing for flounder can throw you some curveballs. Understanding and troubleshooting common rig problems on the fly can save your day.
Line Twist: This is a perpetual nuisance, especially when drifting or using baits that spin. It leads to weakened line, tangles, and frustrating re-ties. The best defense is a good quality barrel swivel between your main line and leader, which allows your line to twist independently. Also, avoid constantly reeling against a fish or snag that is spinning, and check your line periodically for twists. If you're constantly getting twists, consider changing your presentation or ensuring your bait is rigged to minimize spinning.
Snags: Bottom fishing inherently means encountering snags – oyster shells, rocks, crab pots, and other submerged debris. Losing tackle is part of the game, but you can minimize it. If you're constantly snagging, try reducing your sinker weight slightly or changing its shape (e.g., from a pyramid to a bank sinker if it's getting wedged). Adjusting your casting angle or moving your boat a few feet can sometimes be enough to get you out of a snag-prone area. When you do get snagged, try pulling from a different angle, or if you're on a boat, motor past the snag to try and free your line. Don't just yank straight back, as this often cements the snag. Having extra sinkers and leader material on hand, easily purchased from online sources like Amazon, is a must.
Missed Bites: This is perhaps the most common frustration. If you're feeling bites but not hooking up, several factors could be at play. First, check your hook sharpness. A dull hook simply won't penetrate. Second, your bait might be too large for the flounder to easily engulf, or conversely, too small to be appealing. Adjusting the size of your bait or even the style of hook (e.g., a Kahle hook for live bait) can make a difference. Third, your setting technique might be off. Are you giving the fish enough time to fully take the bait? Or are you waiting too long, allowing them to feel the hook and spit it? Practice and patience are the only remedies here. Finally, ensure your rig is properly balanced; if your sinker is too heavy or your leader too short, it might be creating an unnatural presentation that fish are investigating but not committing to. Being prepared to quickly re-tie or modify your setup is the mark of a seasoned angler. For comprehensive information on what you might catch, check out Maryland's Most Popular Saltwater Gamefish.
| Rig Type | Description | Best for | Key Components | Pros | Cons |
|---|---|---|---|---|---|
| High-Low / Double Drop | Two hooks on dropper loops, sinker at bottom | Piers, moderate current, varied bait | Leader, 2-3 hooks, beads, swivels, bottom sinker | Presents multiple baits, covers water column slightly | Prone to tangles, sinker movement can spook fish |
| Fish Finder | Sliding sinker on main line, leader to hook | Drifting, light current, sensitive bites | Sliding sinker, bead, swivel, leader, hook | Allows fish to run with bait, very natural presentation | Can tangle with strong current, only one bait presented |
Disclaimer
This article is for general informational purposes only and does not constitute professional advice. Laws, prices and regulations vary by location and change over time. Consult a qualified professional for guidance on your specific situation.